Set up Clips & Tags
The Clips & Tags feature enables to automatically generate important or meaningful video clips and tags by AI which you can instantly focus on through specifying your preferences. This feature only supports VOD contents.
This article details instructions on how to create and edit clips & tags for VOD contents.
Enable Clips & Tags Feature
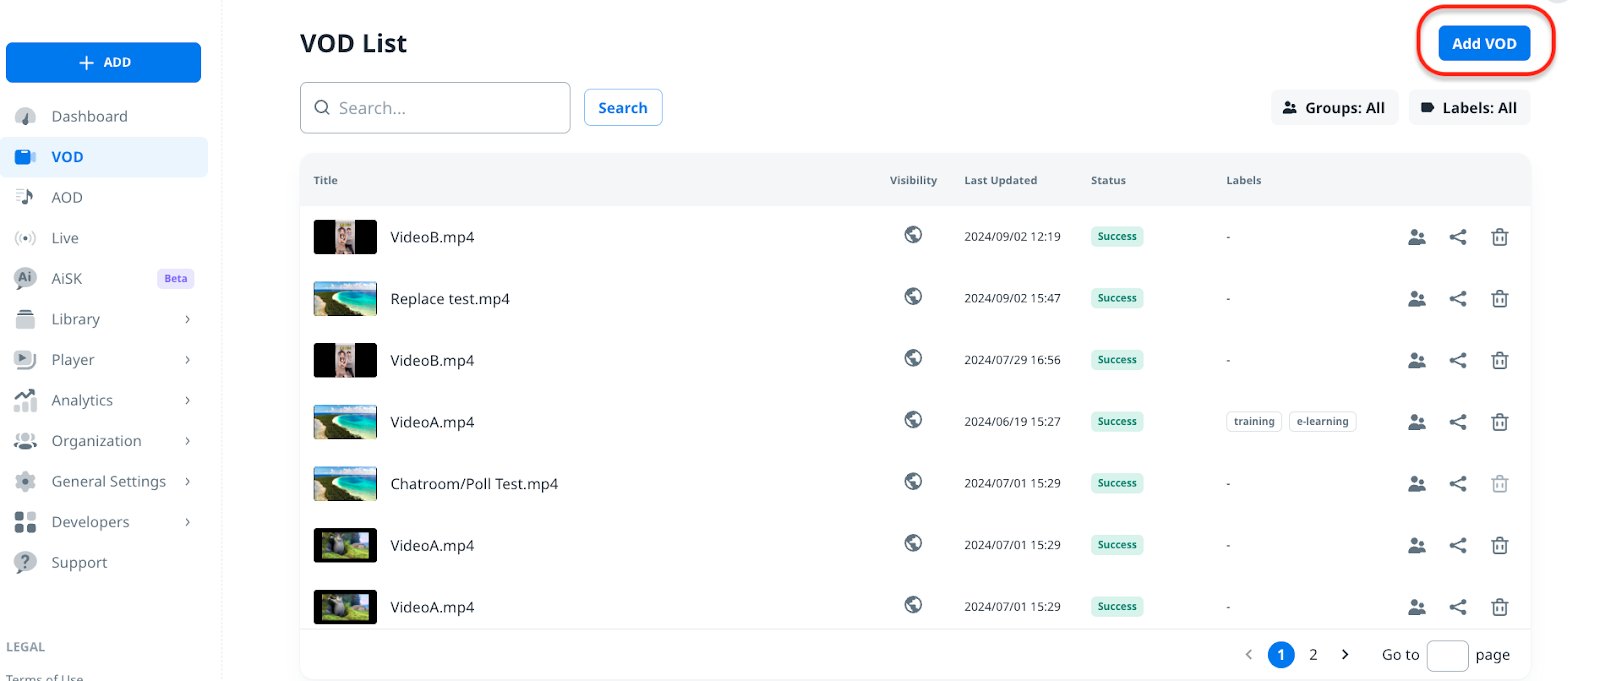
1. Access the VOD List via the sidebar on the BlendVision web console, then click “Add VOD” button to create a new VOD.
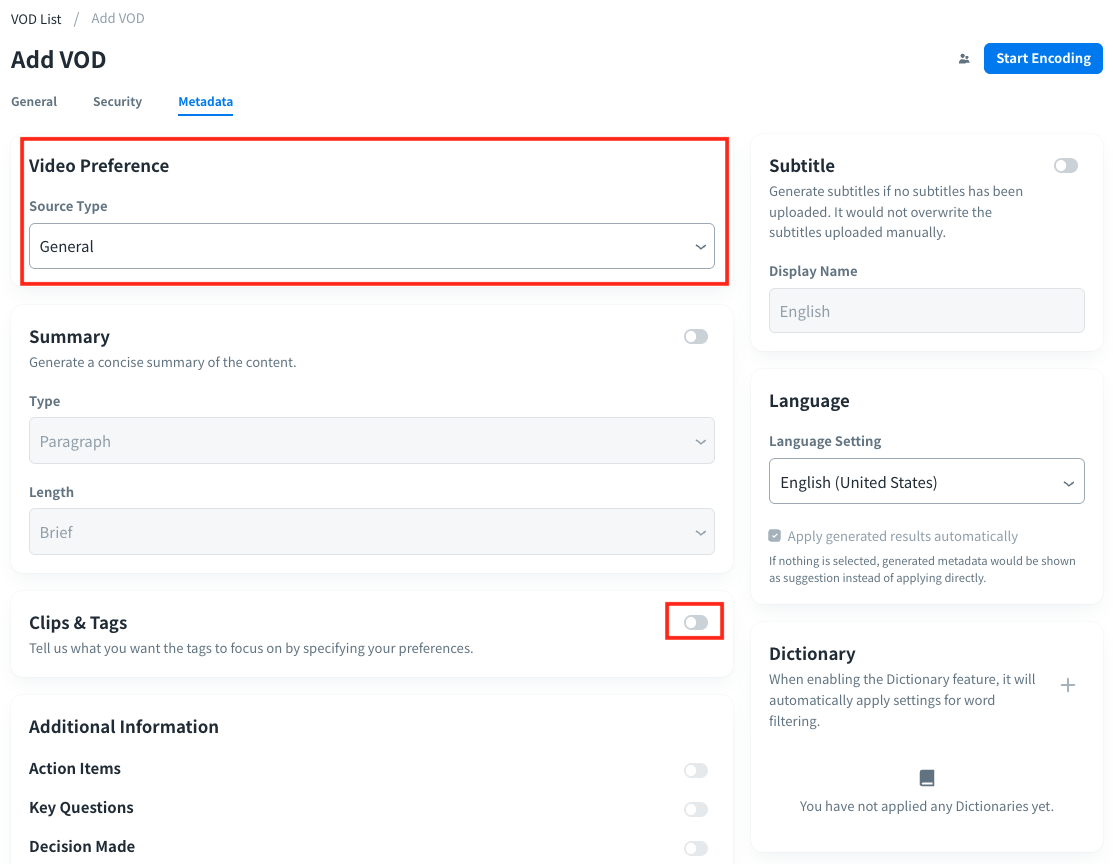
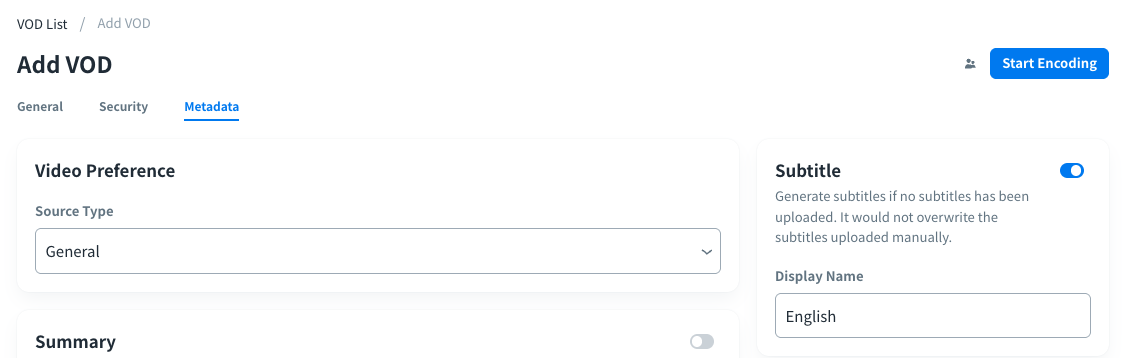
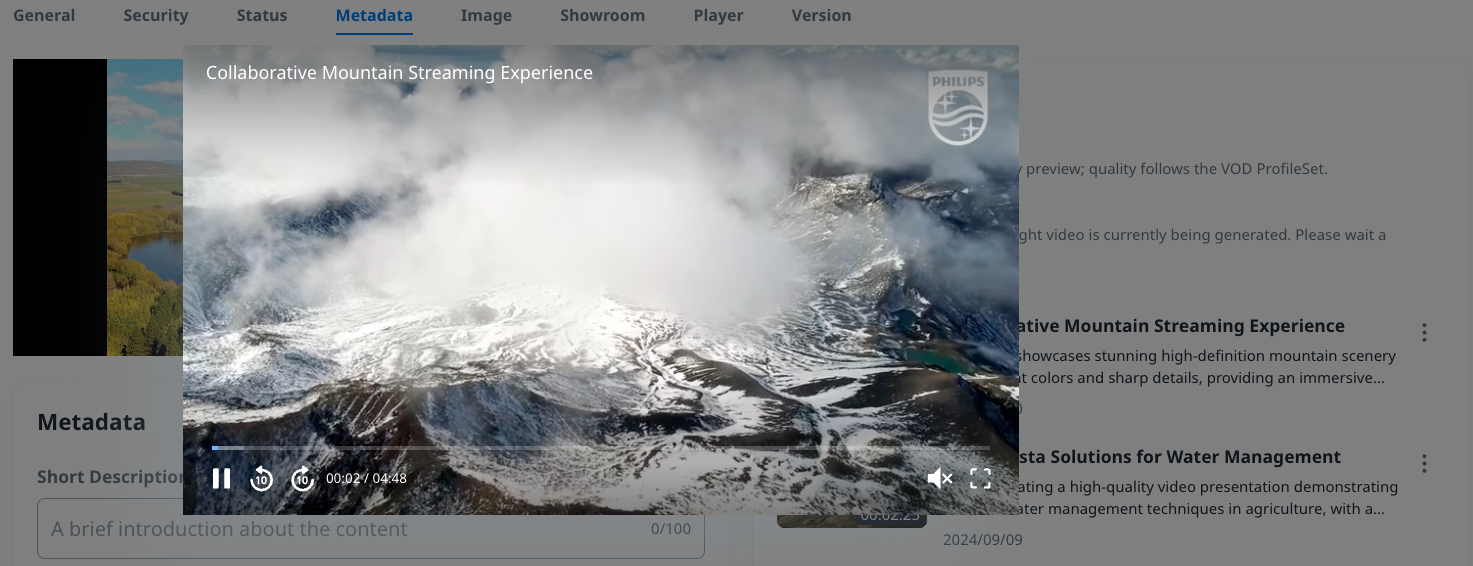
2. After you choose the video you want to upload in the “General” tab, click the “Metadata” tab to select the video’s source type, and enable "Clips & Tags”.
Enabling Clips & Tags will enable subtitle and dictionary features as well in some cases based on the selection of “Tag by”.
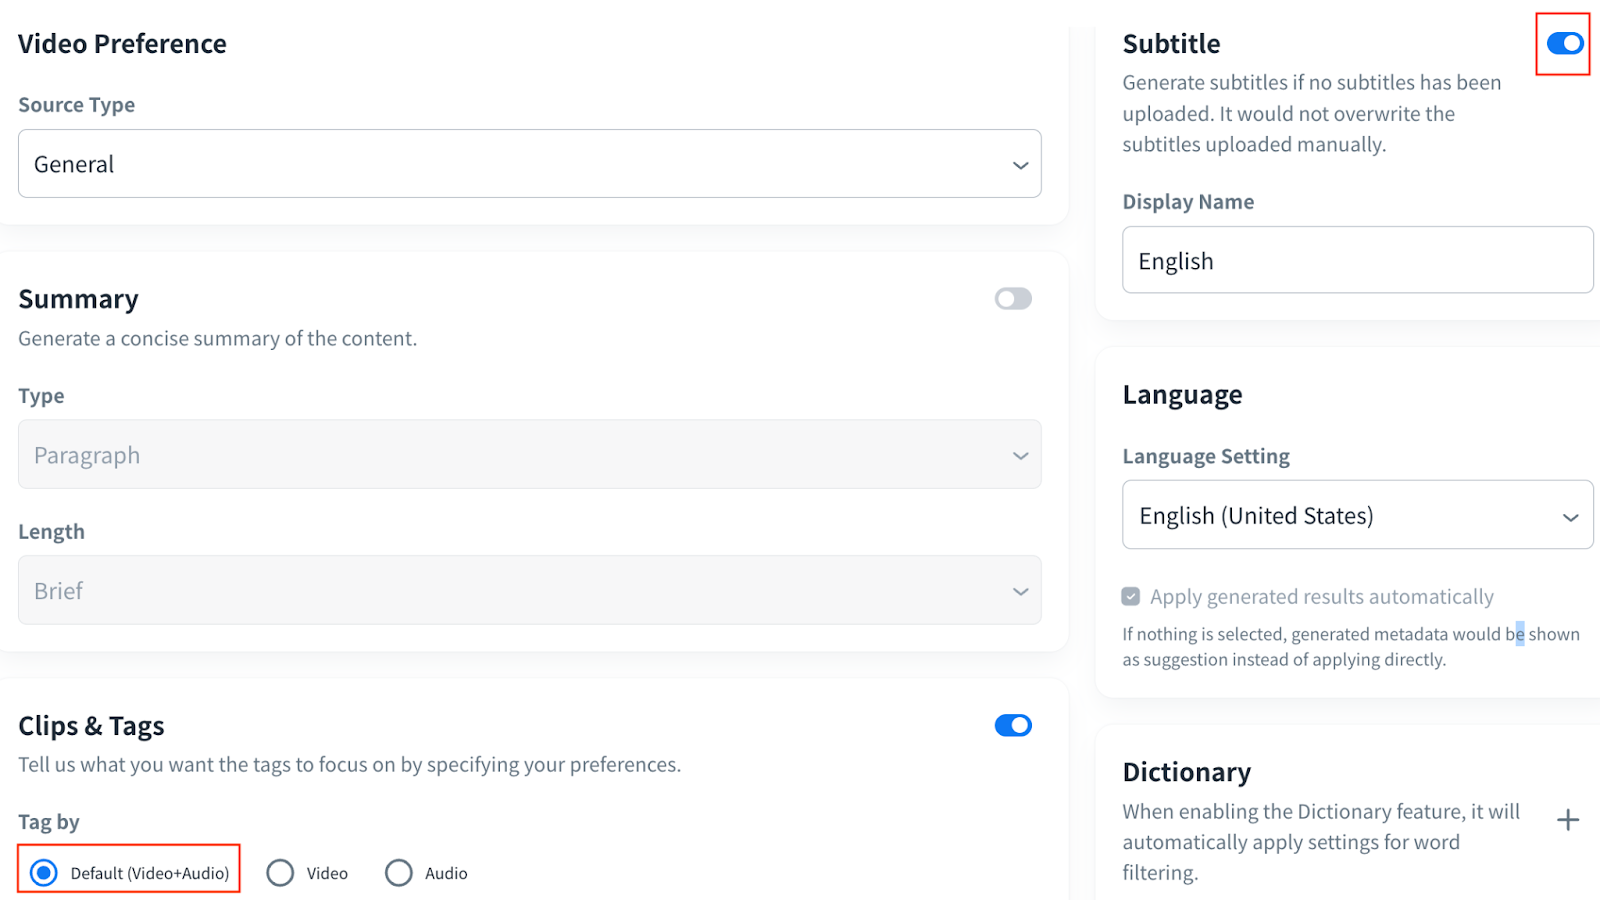
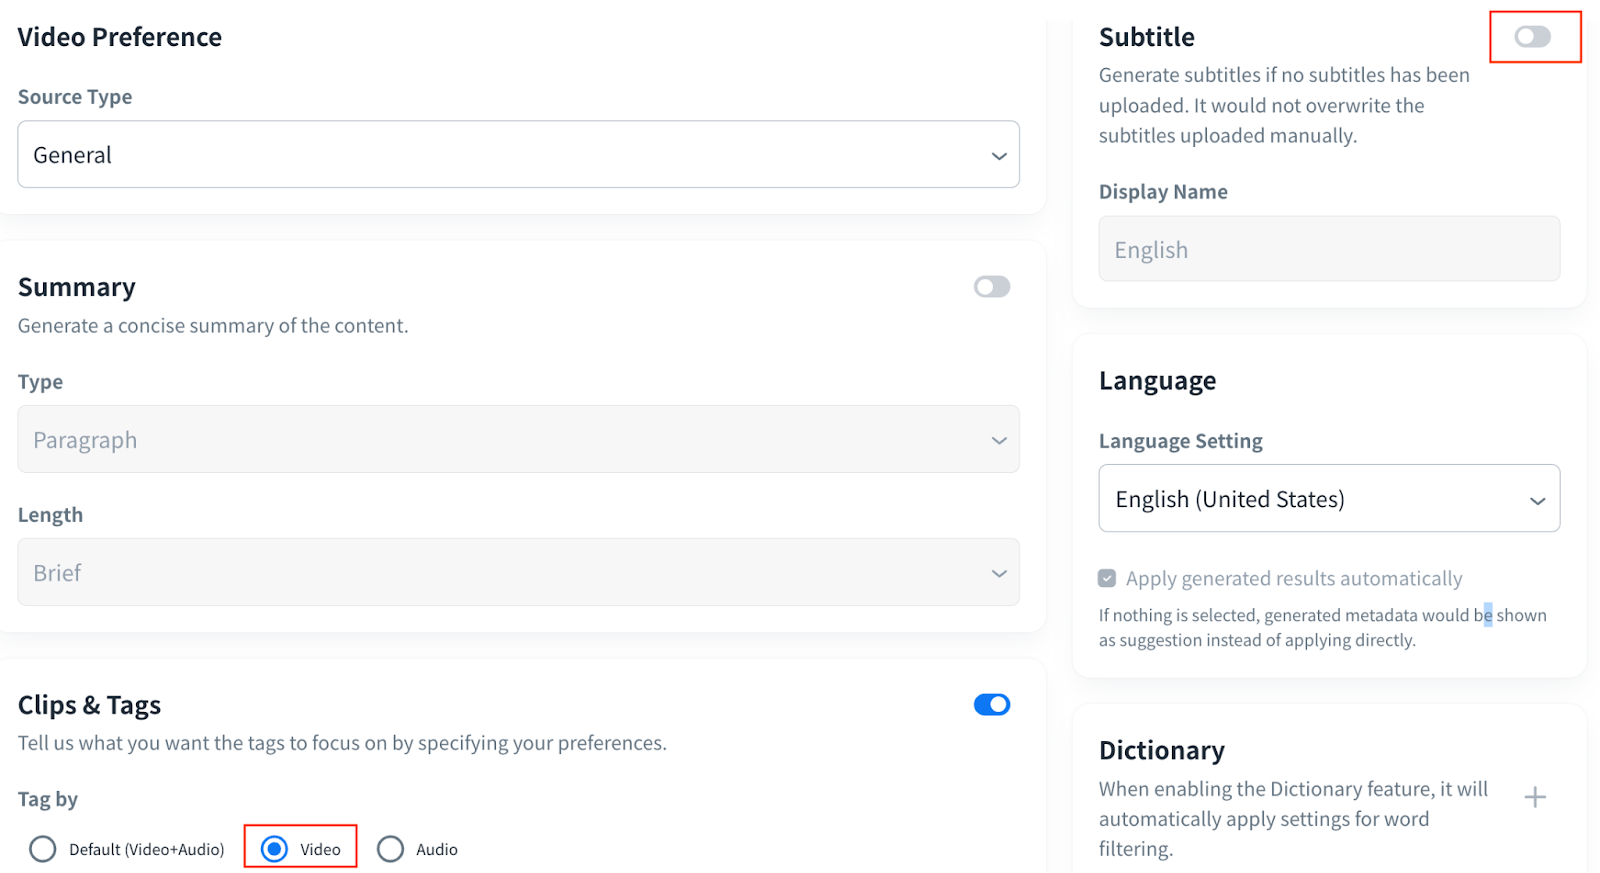
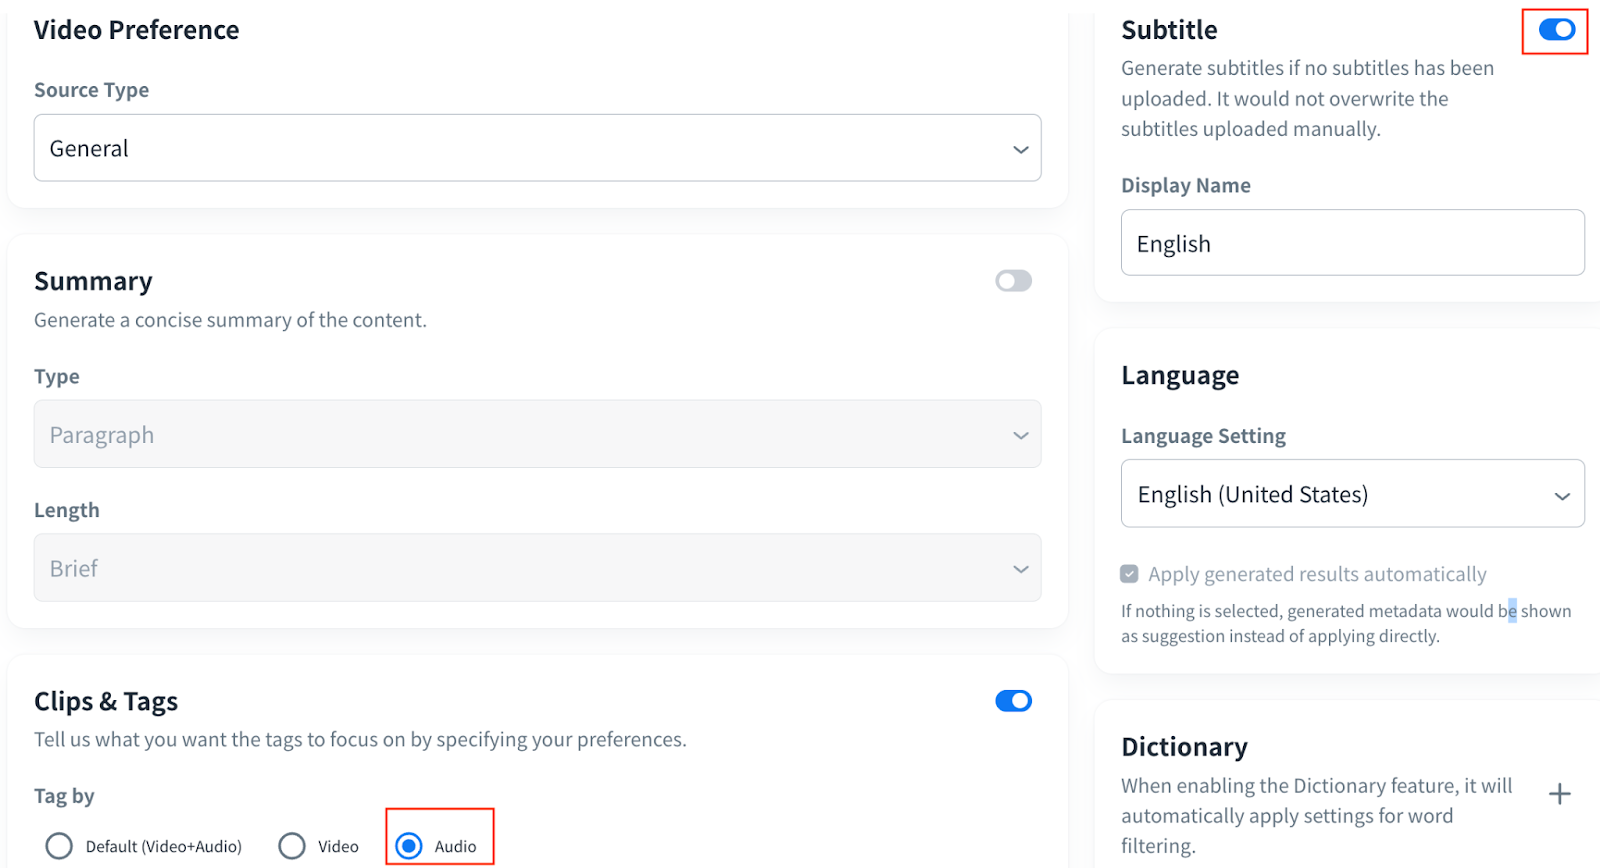
“Tag by” selection means how to generate tags from different source types of VOD. You can select from Default (Video+Audio), Video or Audio.
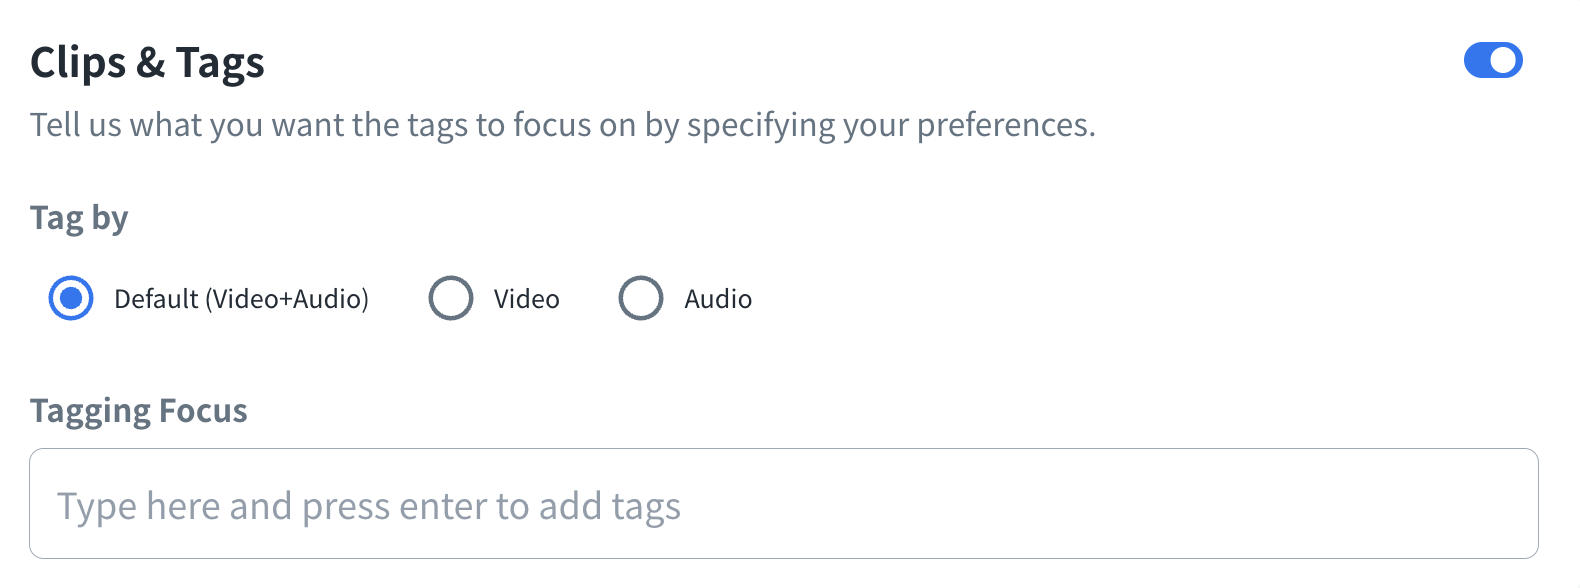
- Default (Video+Audio): Tags will be generated according to the general VOD contents with both video and audio. Subtitle will be activated simultaneously when Clips & Tags is enabled (required).
- Video: Tags will be generated according to the VOD with video file only. Subtitle will be activated simultaneously when Clips & Tags is enabled. However, for user convenience, the “Subtitle” feature can be turned off.
- Audio: Tags will be generated according to the VOD with audio file only. Subtitle will be activated simultaneously when Clips & Tags is enabled (required).
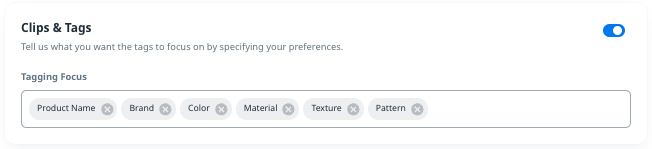
Tagging Focus will consolidate the significant topics for your content, You can add new tagging focuses by manual.
If you would like to know what the suitable attributes are for tagging focus, please refer to the Regenerate Clips & Tags> Tagging Focus List for more details.

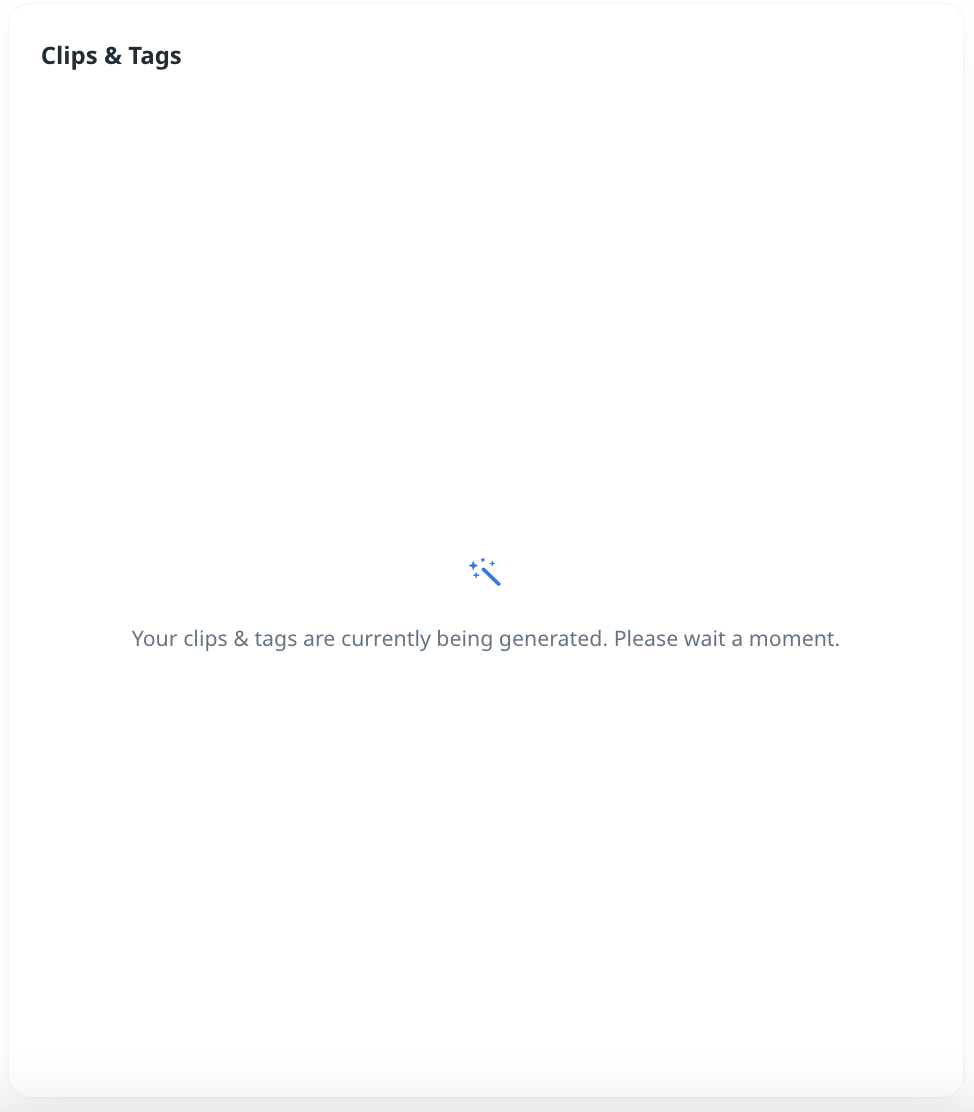
Then, click the “Start Encoding” button at the upper right corner to start encoding the VOD and automatically generate clips & tags.
After encoding is completed, you can click the “Metadata” tab to confirm the clips & tags.
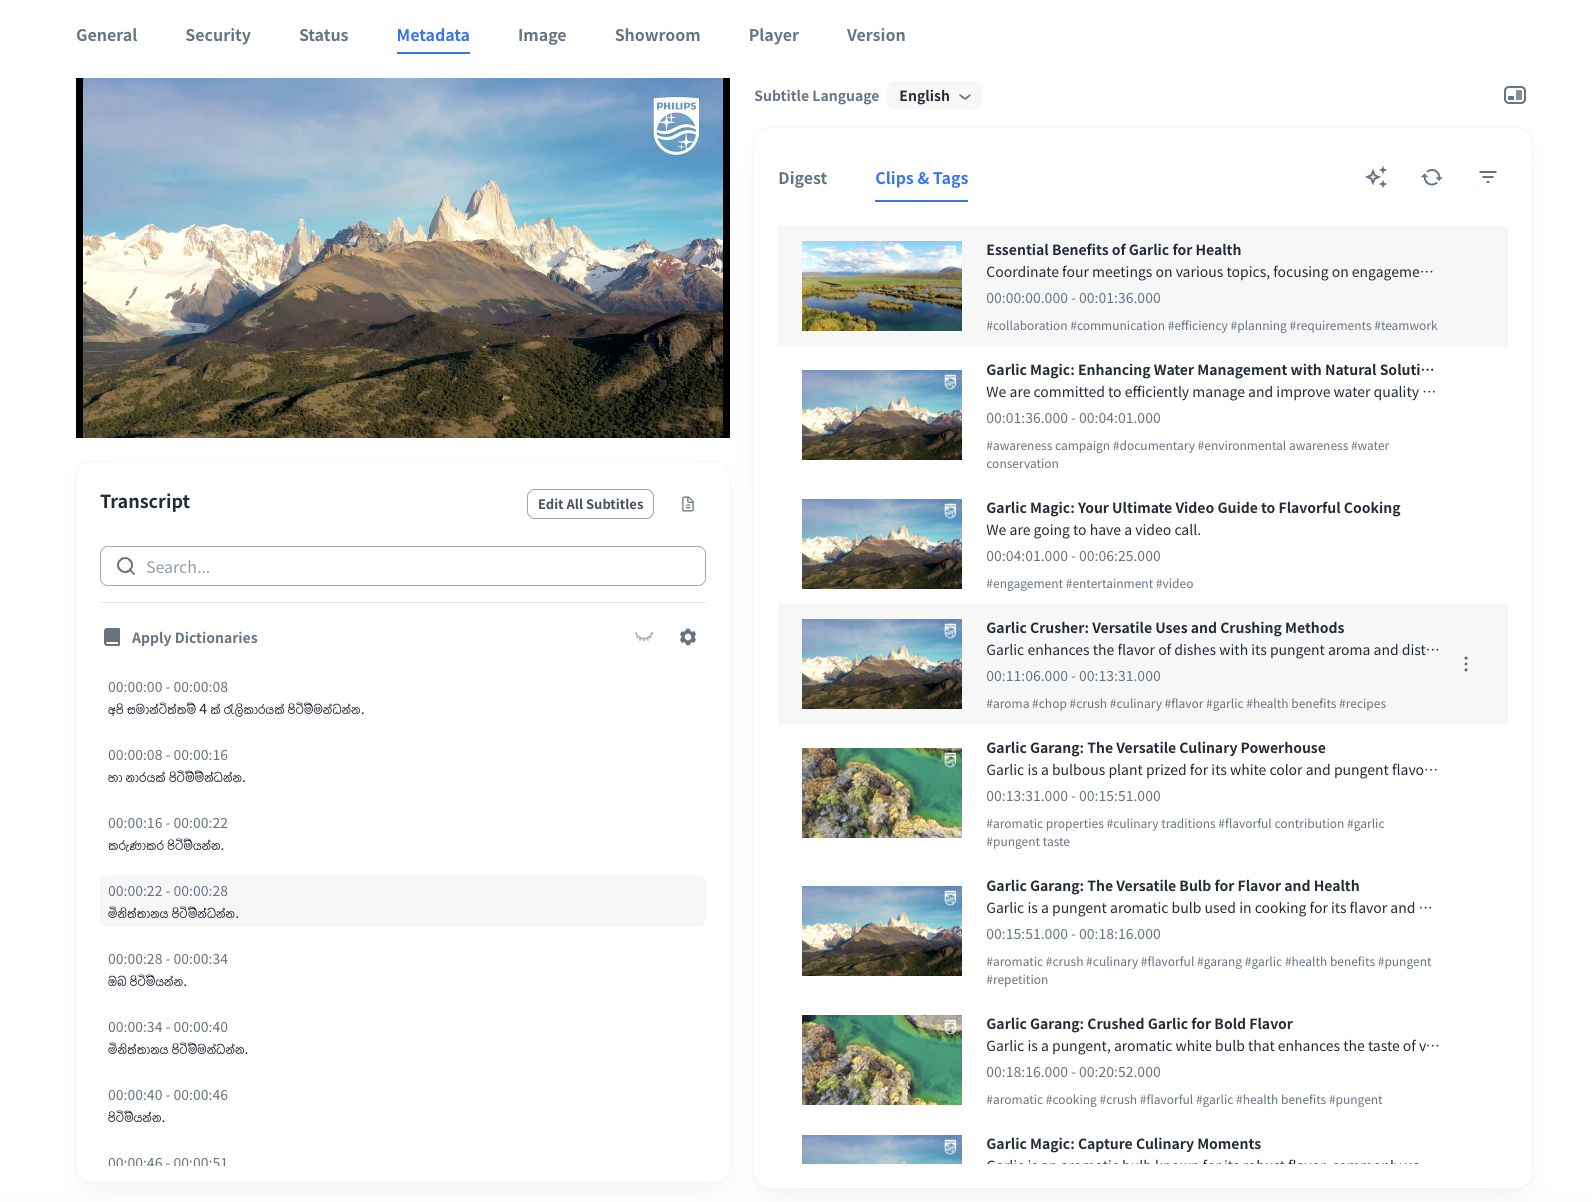
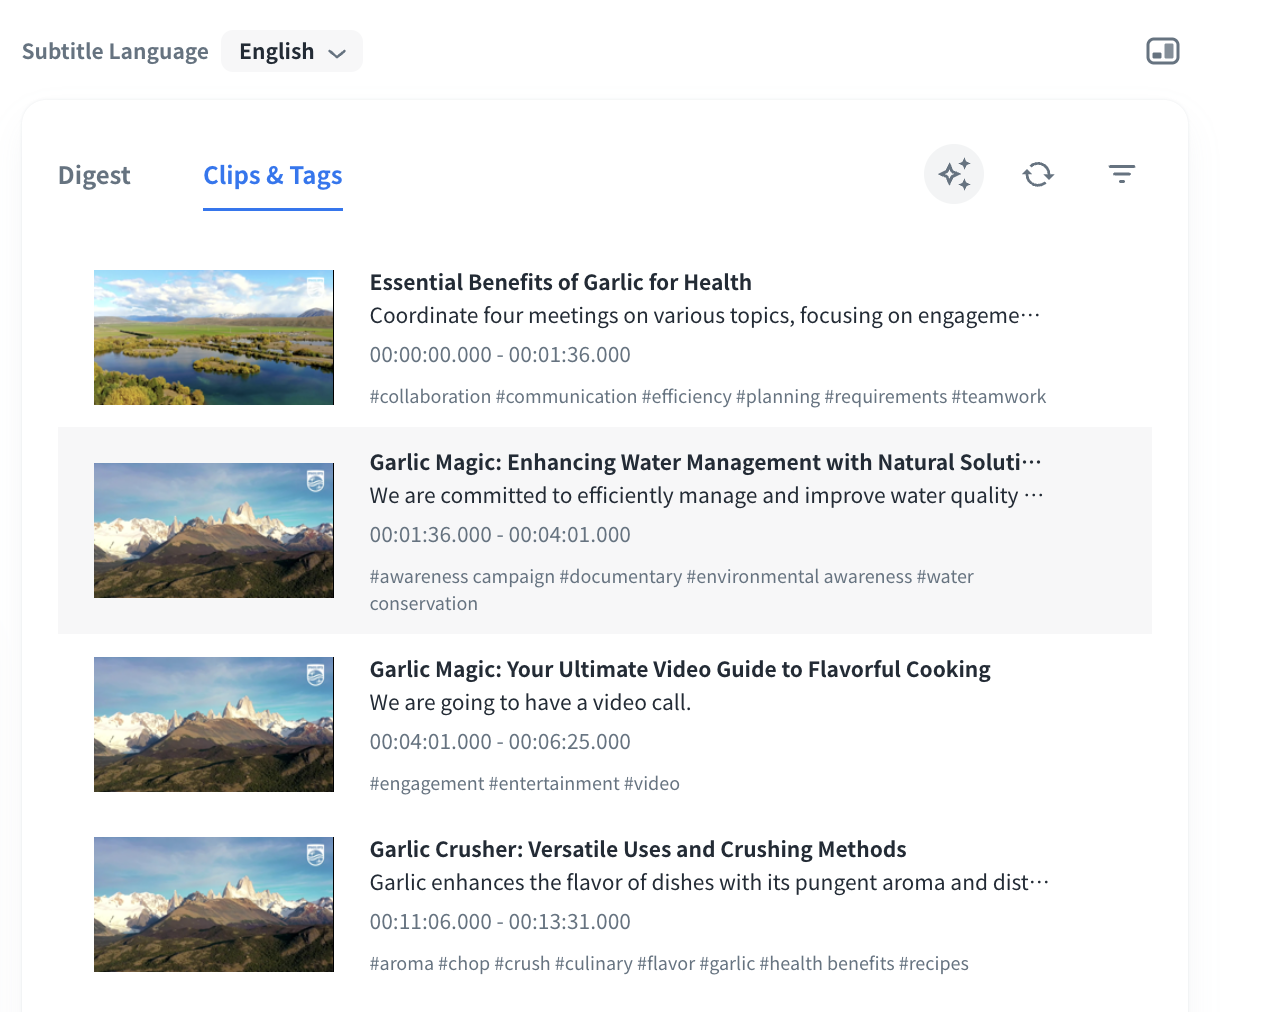
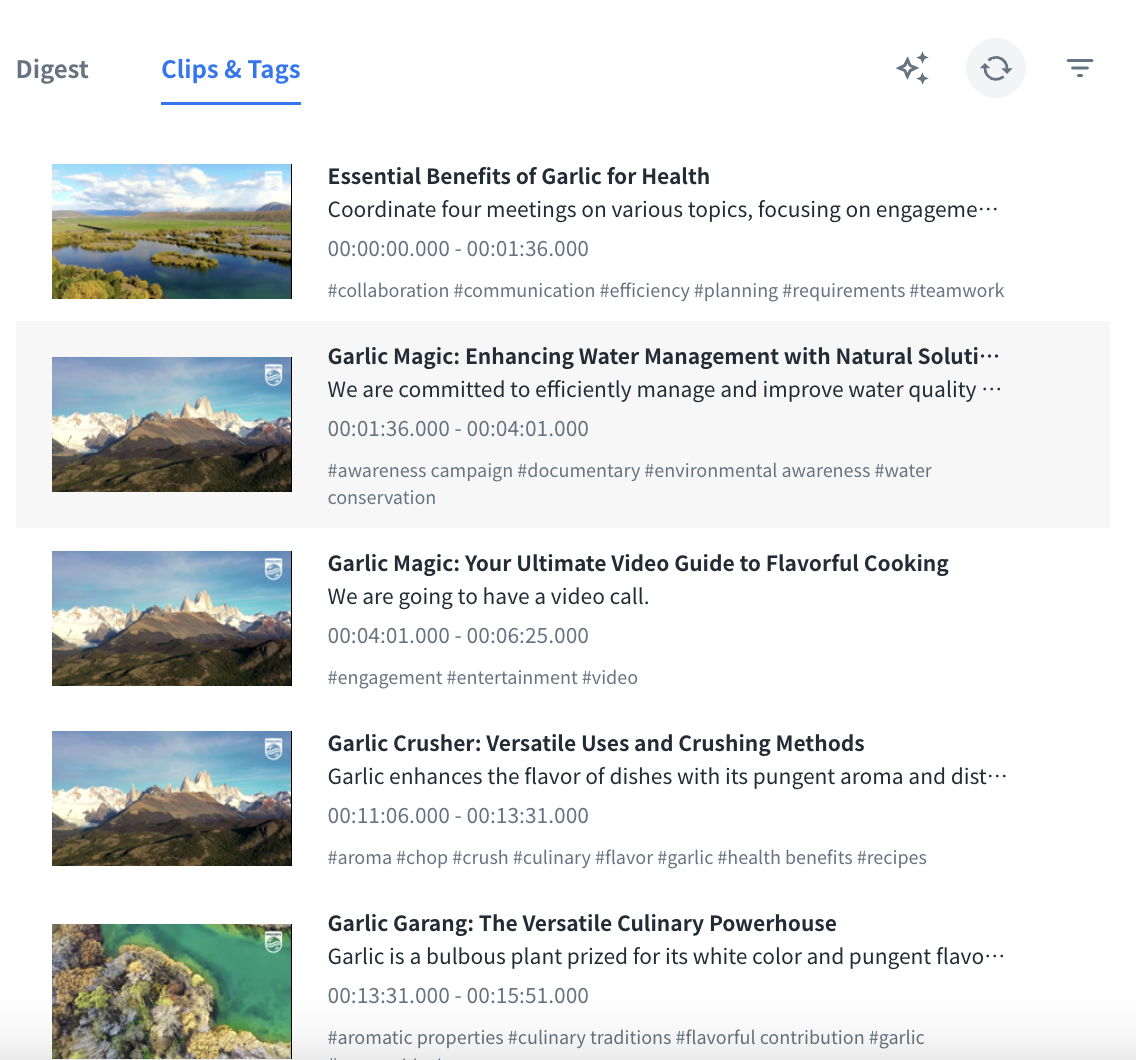
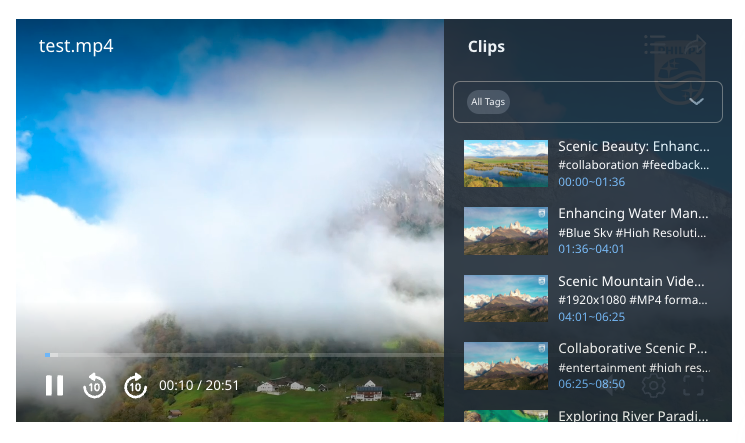
When clicking one of the clips on the player, the screen will jump to the specified timestamp to play the content.
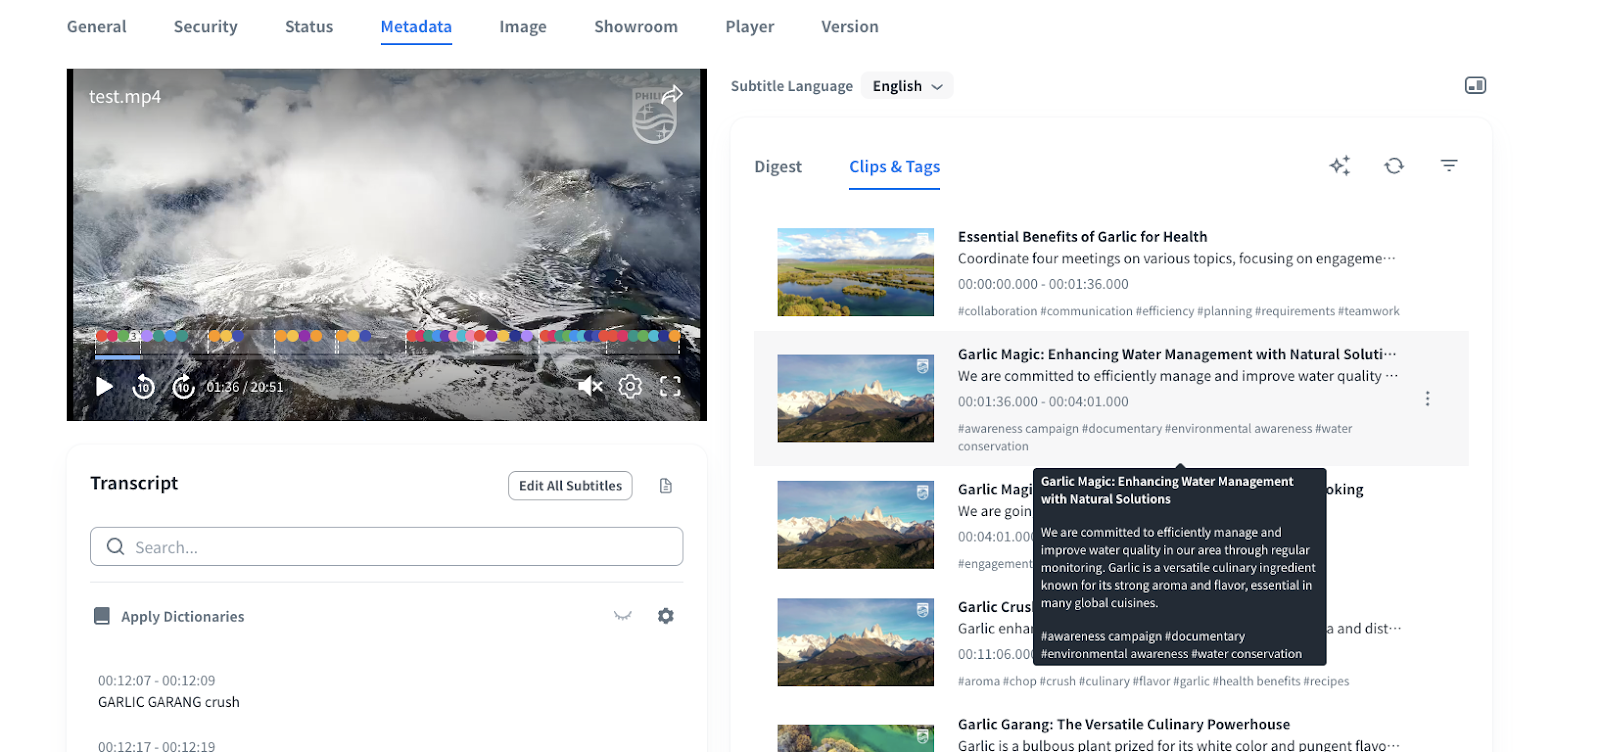
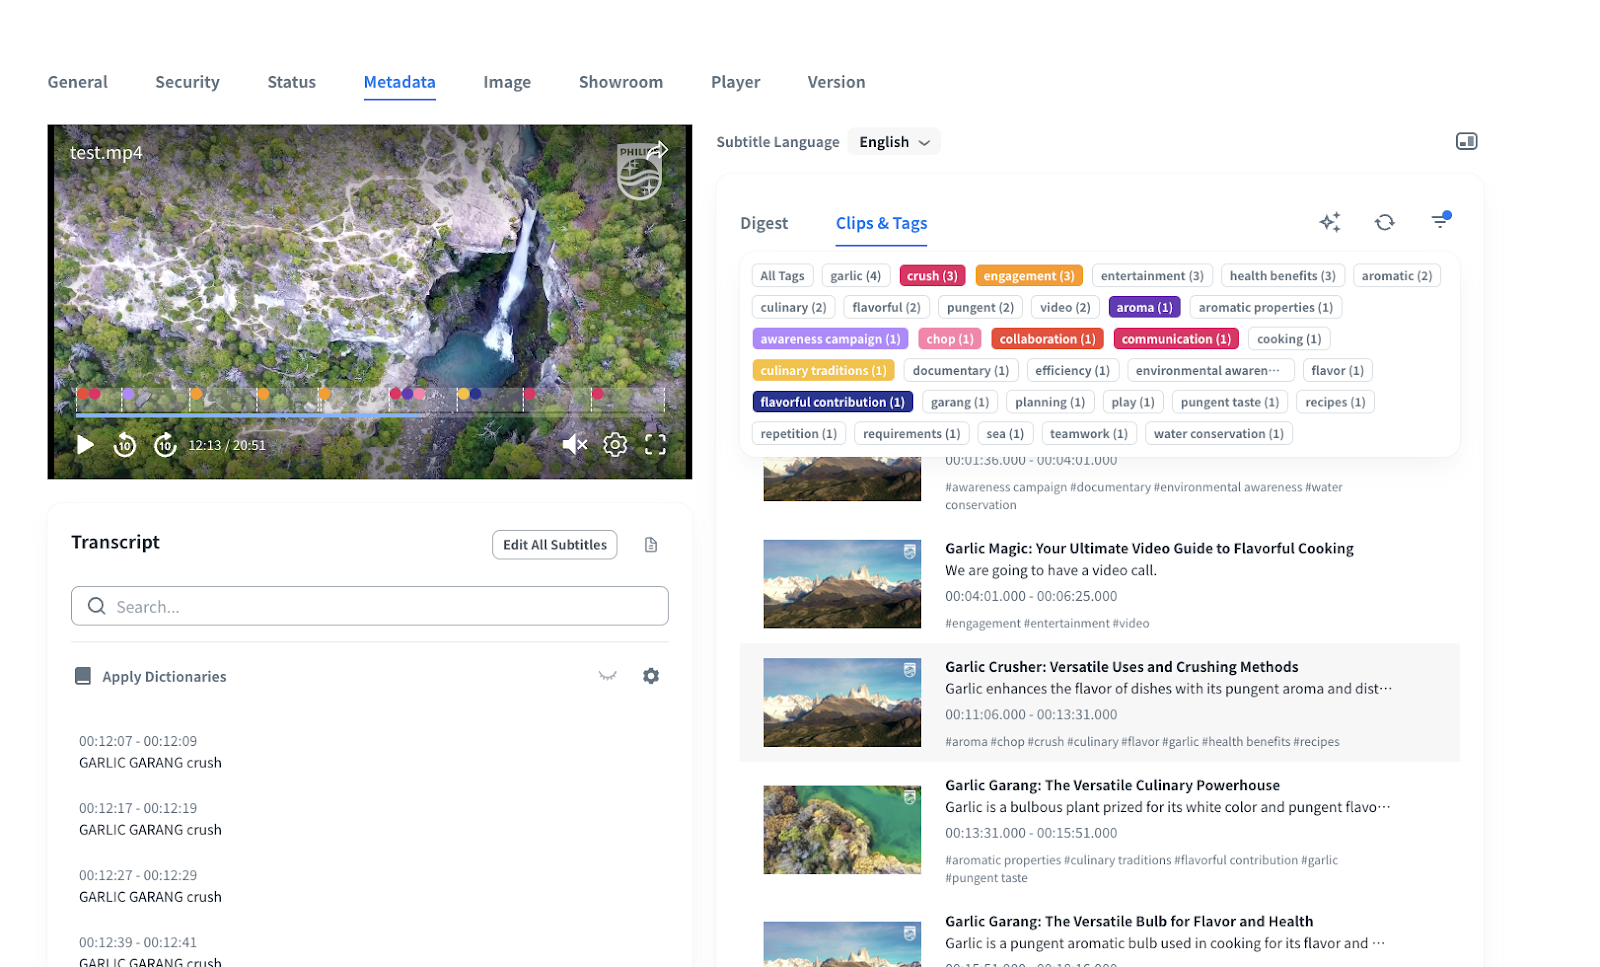
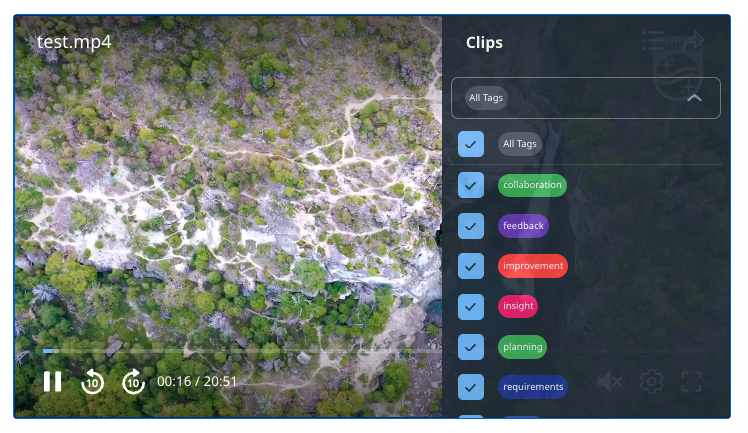
You can click ![]() button to select the tags you prefer and the related clips will be shown on the player for easy confirmation.
button to select the tags you prefer and the related clips will be shown on the player for easy confirmation.
Edit Clips & Tags Information
You can edit the auto-generated clips & tags information to meet your requirements.
- Hover on the clip and then the “Setting” icon will be shown.
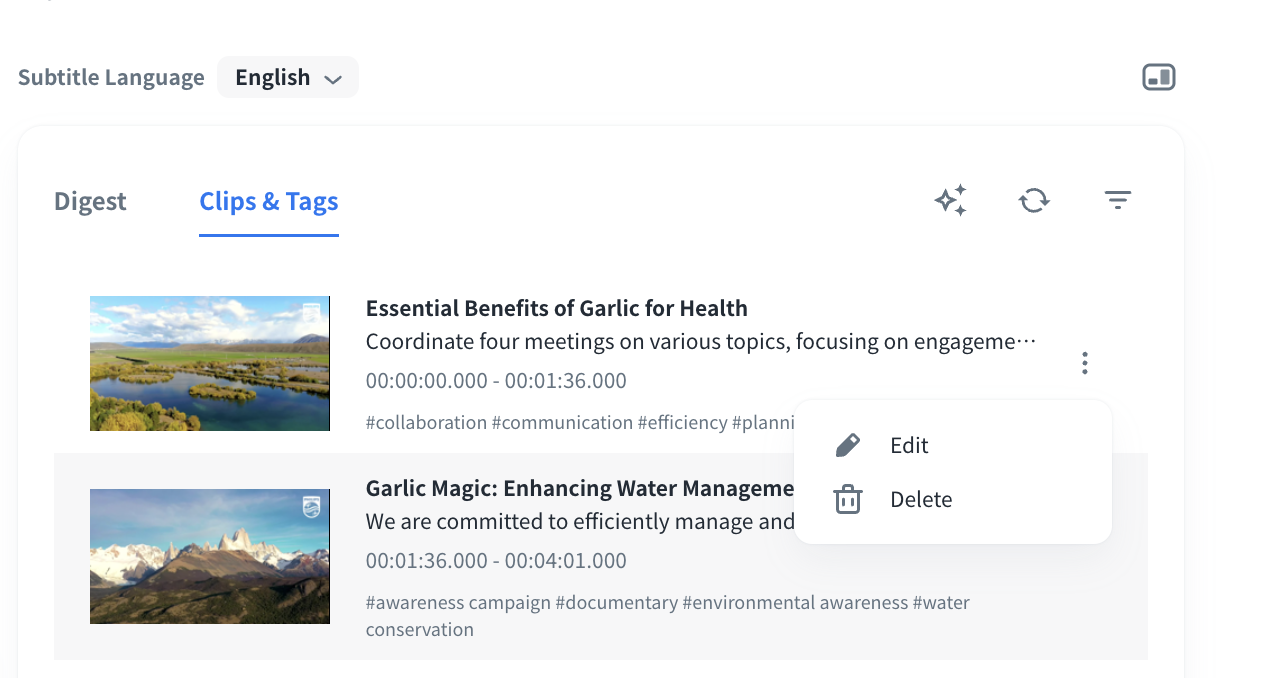
- Click the “Setting” icon and select the “Edit” button to start editing the clip’s information. Or, select the “Delete” button to delete the clip if needed.

- The following information can be edited.
- Title: Maximum is 50 characters.
- Description: Maximum is 500 characters.
- Start time and end time: The shortest time interval is 15 seconds and the clip length cannot exceed video duration.
- Tags: Add up to 10 tags only and maximum is 50 characters per tag.
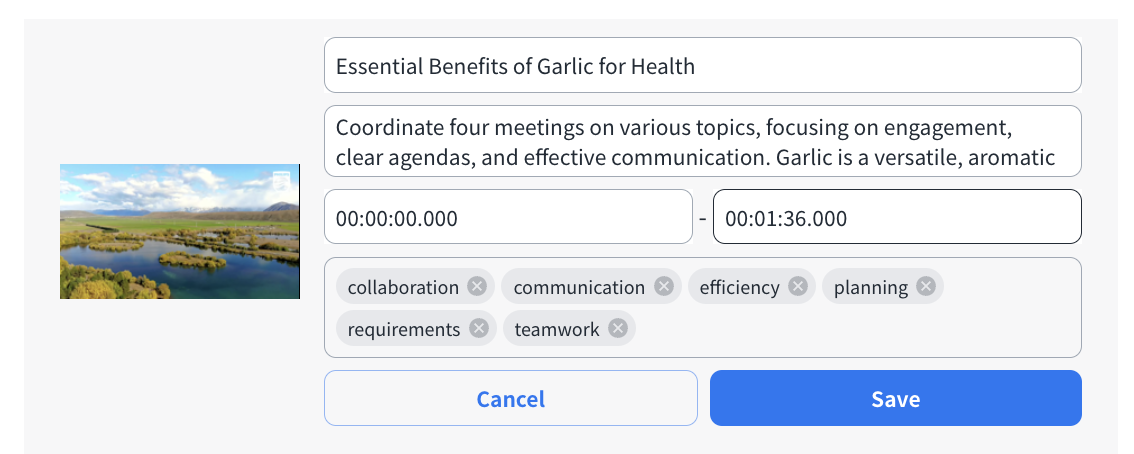
- When your editing is completed, click “Save” button to save your revision.

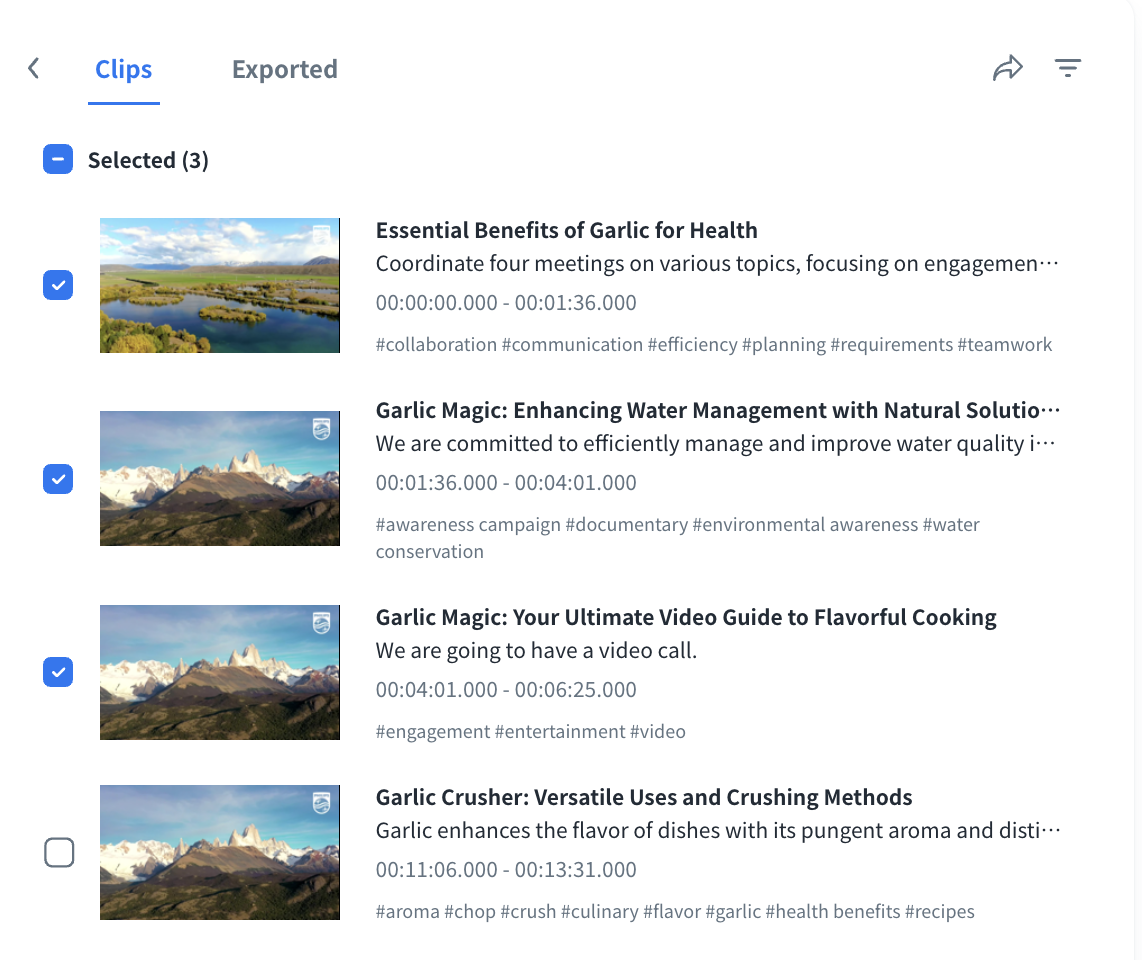
Highlight Setting & Export
You can select the generated clips or the clips with tags you want to export.
- Click the “Highlight Setting
 ” button
- Select the preferred clips or click the tags to filter out the clips. Then, click the “Export” button to start generating the highlight clips.
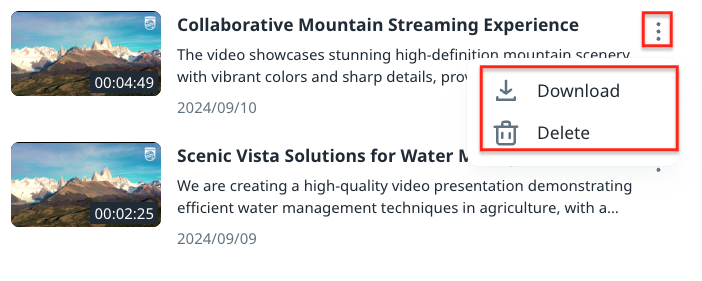
- Click the “Exported” tab to confirm the highlight clips that are preparing for exporting or ready to export.
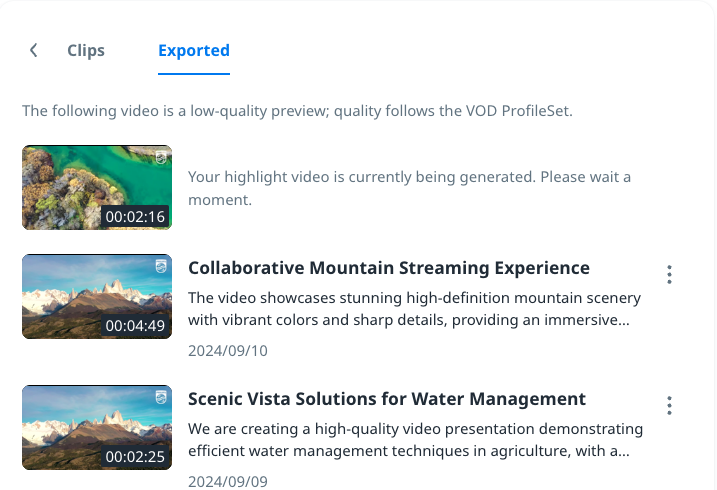
- Click the clip to preview the content.
- Click “Setting” icon at the upper-right side to download or delete the clip.
Regenerate Clips & Tags
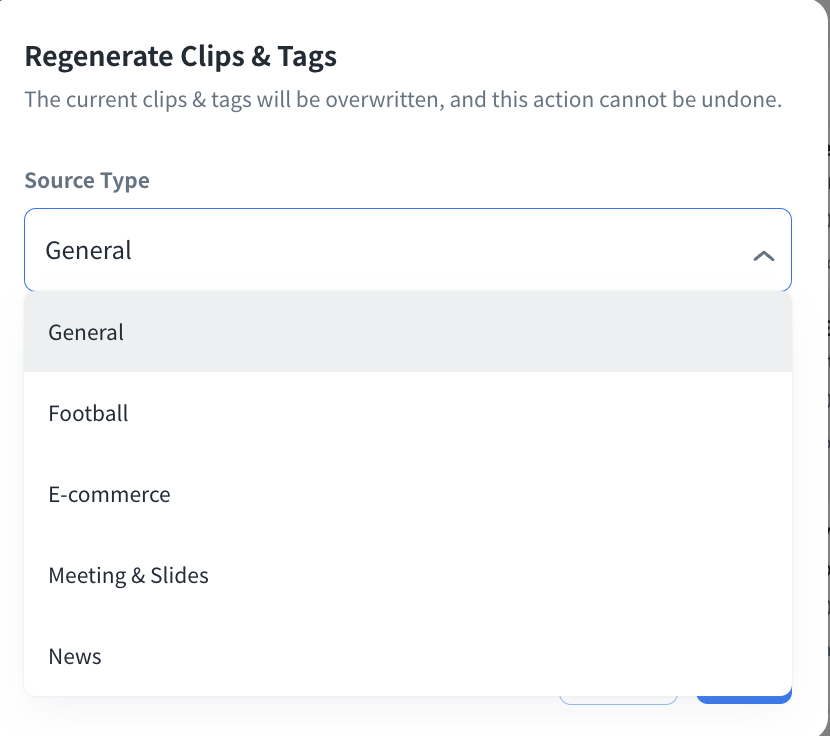
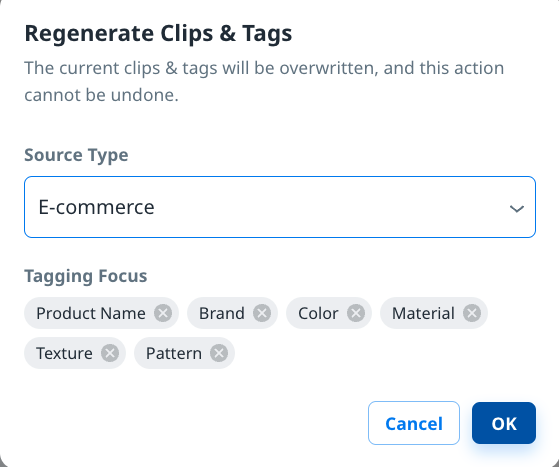
You can also regenerate clips and tags if the current generated ones do not meet your needs.
- Click “Regenerate
 ” icon to start regenerating the clips & tags of the video.
-
Select the proper Source Type which is closer to your content to enhance the accuracy.
-
Tagging Focus will consolidate the significant topics for your content, keep/remove the ones per your needs. You can also add a new tagging focus by manual.
Tagging Focus List
Source Type
Attribute
Description
E-commerce
Product Name
Specific items being featured
Brand
Brand associated with the product
Color
Available color options for the product
Meterial
Materials used in the product
Texture
Surface feel or finish of the product
Pattern
Design or pattern on the material
Meeting & Slides
Meeting & Time
Name or topic of the meeting
Date & Time
Meeting time
Participants
Names and roles of attendees
Agenda
Main topics
Key Points
Important points or decision made
Action Items
Tasks or follow-up assigned
Slides/Visuals
Titles and contents of meeting slides
News
Headline
Main news title or summary
Date & Time
Publish time
Reporter
Name of the journalist or correspondent
Location
Where the news event occurred
Category
Types of news
Key Figures
People involved or mentioned in the news
Events
Specific happenings or incidents reported
Quotes
Notable quotes from interviews or statements
Background Information
Context or history related to news
Visuals
Associated images or videos
-
Click “OK” button to start regenerating.
Note:
- This action cannot be undone.
- Once you start regenerating clips and tags, the generated clip list in Highlight Setting will be deleted.
- Max: 10 tagging focuses per content.
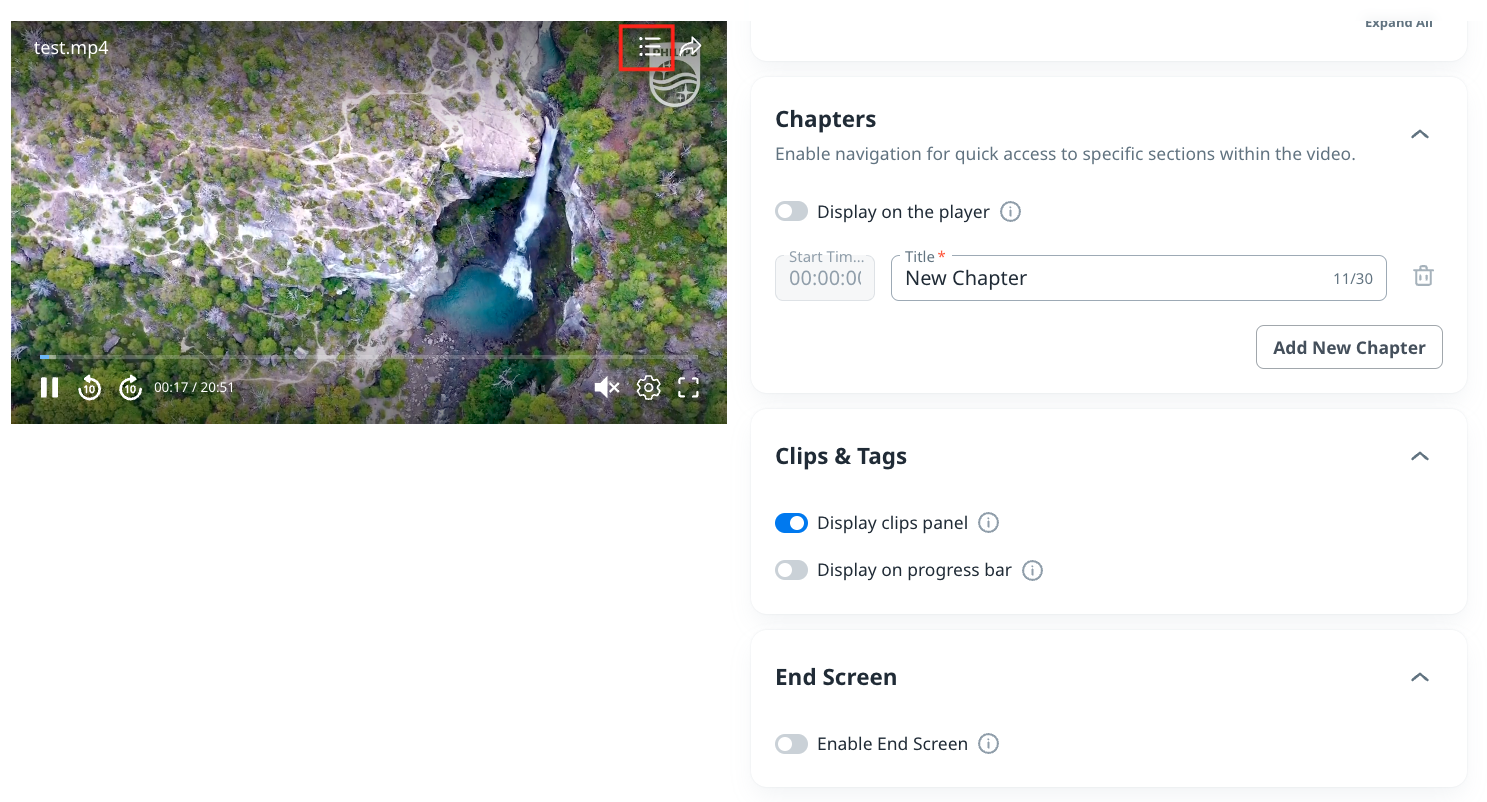
Enable Clips & Tags Feature on Showroom
Clips & Tags feature can be shown on the player for your users to search quickly according to their preference.
Click “Player” tab and enable the Clips & Tags feature on showroom.
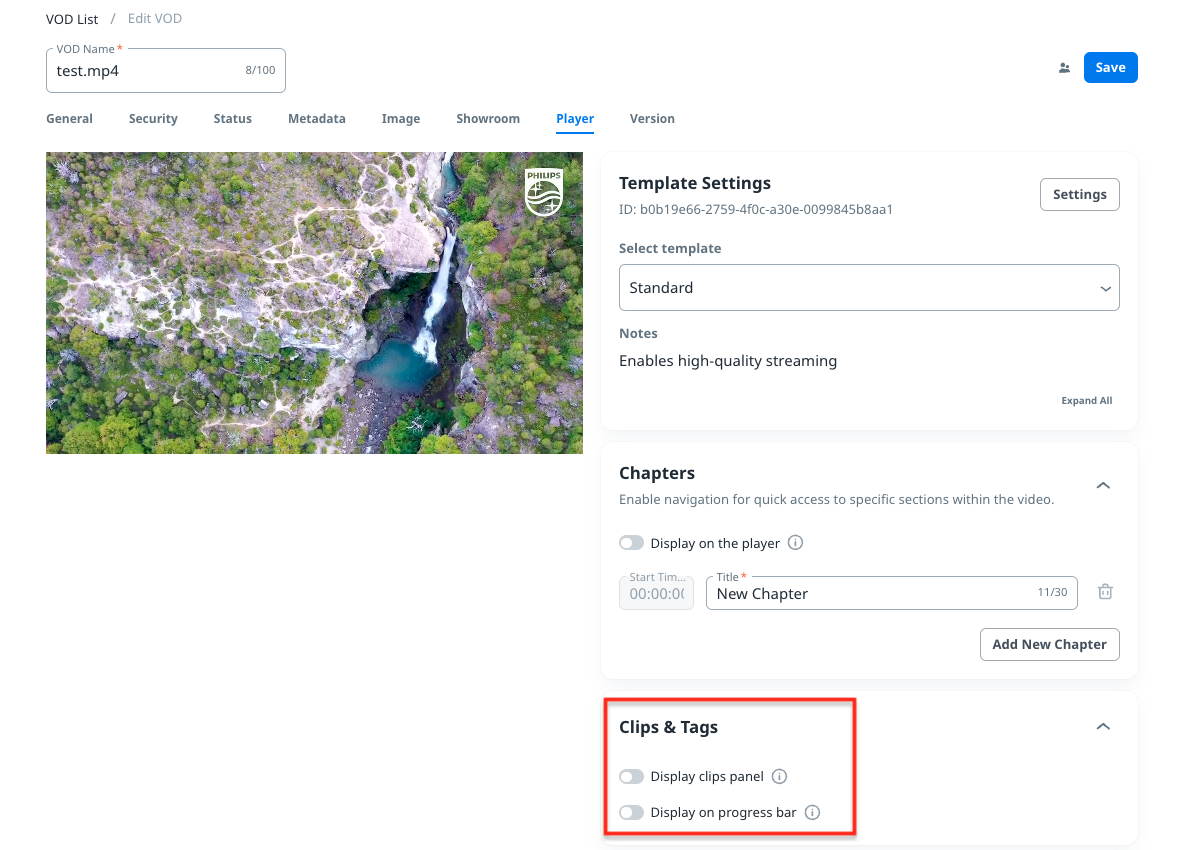
- Enable "Display clips panel" and click “Save” button to show clips on the panel
Click the list icon at the upper-right side and your user can confirm the clips of the content on showroom.
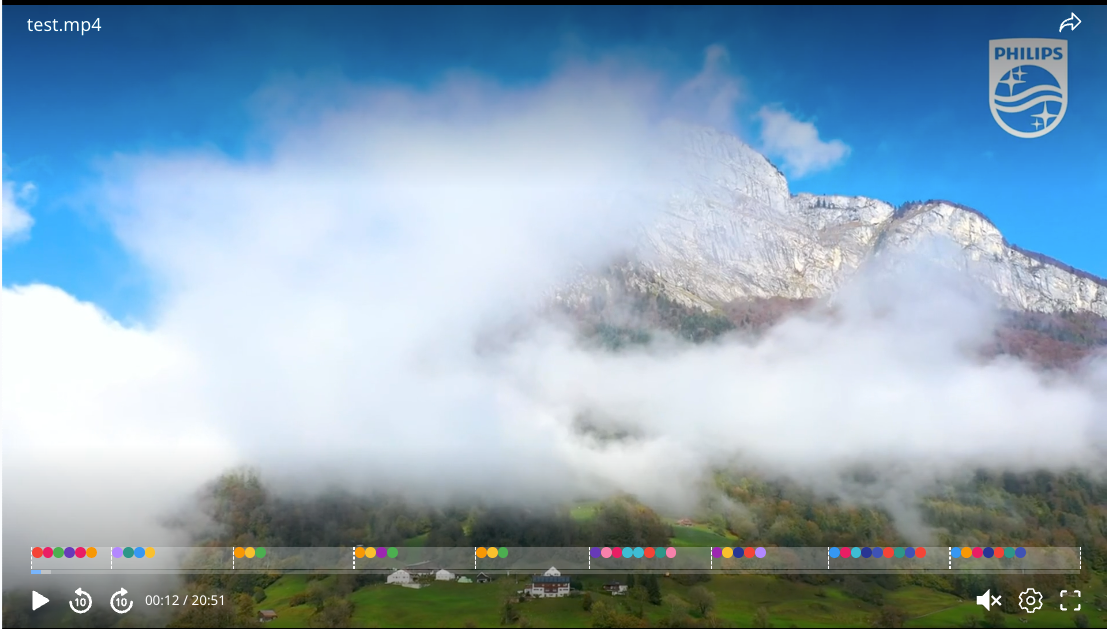
- Enable "Display on progress bar" and click “Save” button to show tags on progress bar
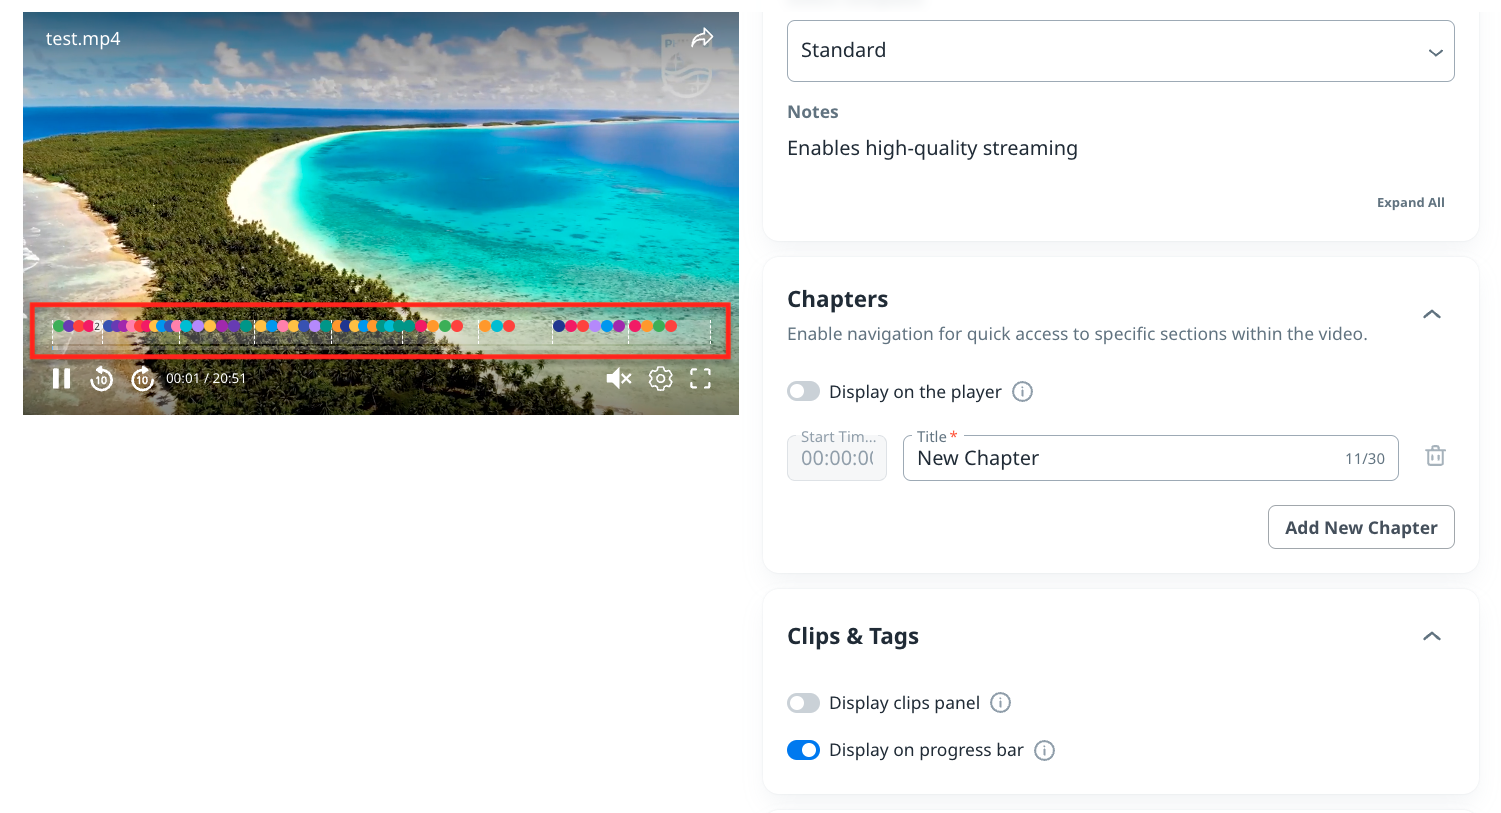
Your user can confirm the tags of the content on progress bar on showroom.